Tuesday, June 12, 2012

Dr. Ray's Famous Grand Prize Chili

This is Chris' favorite chili recipe. It has a giant beefy, spicy flavor that will put hair on your chest! I guess being that I'm not a true Texan, I prefer beans in my chili and I like to add either a can of chopped tomatoes or another can of tomato sauce. I just think it needs a little acidity, but what do I know? This is grand prize chili, people! 

4 pounds chili meat (coarse chili ground or beef cut into small pieces, 1/4 to 1/2 inch cubes, don't use hamburger meat)
Oil
2 medium yellow onions chopped
8 cloves garlic, chopped fine
1 (8-ounce) can tomato sauce

Seasoning spices*:
6 tablespoons Chili powder
2 tablespoon Cumin, ground
1 tablespoon Paprika*
1 teaspoon Oregano, ground
1 teaspoon finely ground black pepper
1 teaspoon Cayenne pepper
1 teaspoon Garlic salt
1 teaspoon Onion powder
1 teaspoon Garlic powder
1 teaspoon Marjoram, ground
1/4 teaspoon Sugar
1/4 teaspoon Celery salt

Beef stock or water (I like to add a mixture of Campbell's beef broth and a regular brand, like Swanson's or Central Market. Campbell's is so incredibly rich that it really gives it a good flavor) I want to say if you buy a few cans of the Campbell's and a few boxes of Swanson's (32 oz boxes) you'll have more than enough.

Brown chili meat in a little oil. Add onion, garlic and continue cooking until the onions are beginning to soften. Add tomato sauce and seasonings. Add beef stock or water to just cover meat. Stir everything together and cook for 2 to 3 hours or until meat is tender. Correct seasonings (salt, etc.).

 Note: The list of seasoning spices may be premixed as a chili seasoning. The mixture may be scaled up, a times 10 increase will yield a mixing bowl full, which will fill 10 to 12 chili powder sized spice jars or keep in a large glass jar in the freezer. Use 3 or 4 tablespoons per pound of meat. It's a good seasoning for tacos as well.

Monday, March 21, 2011

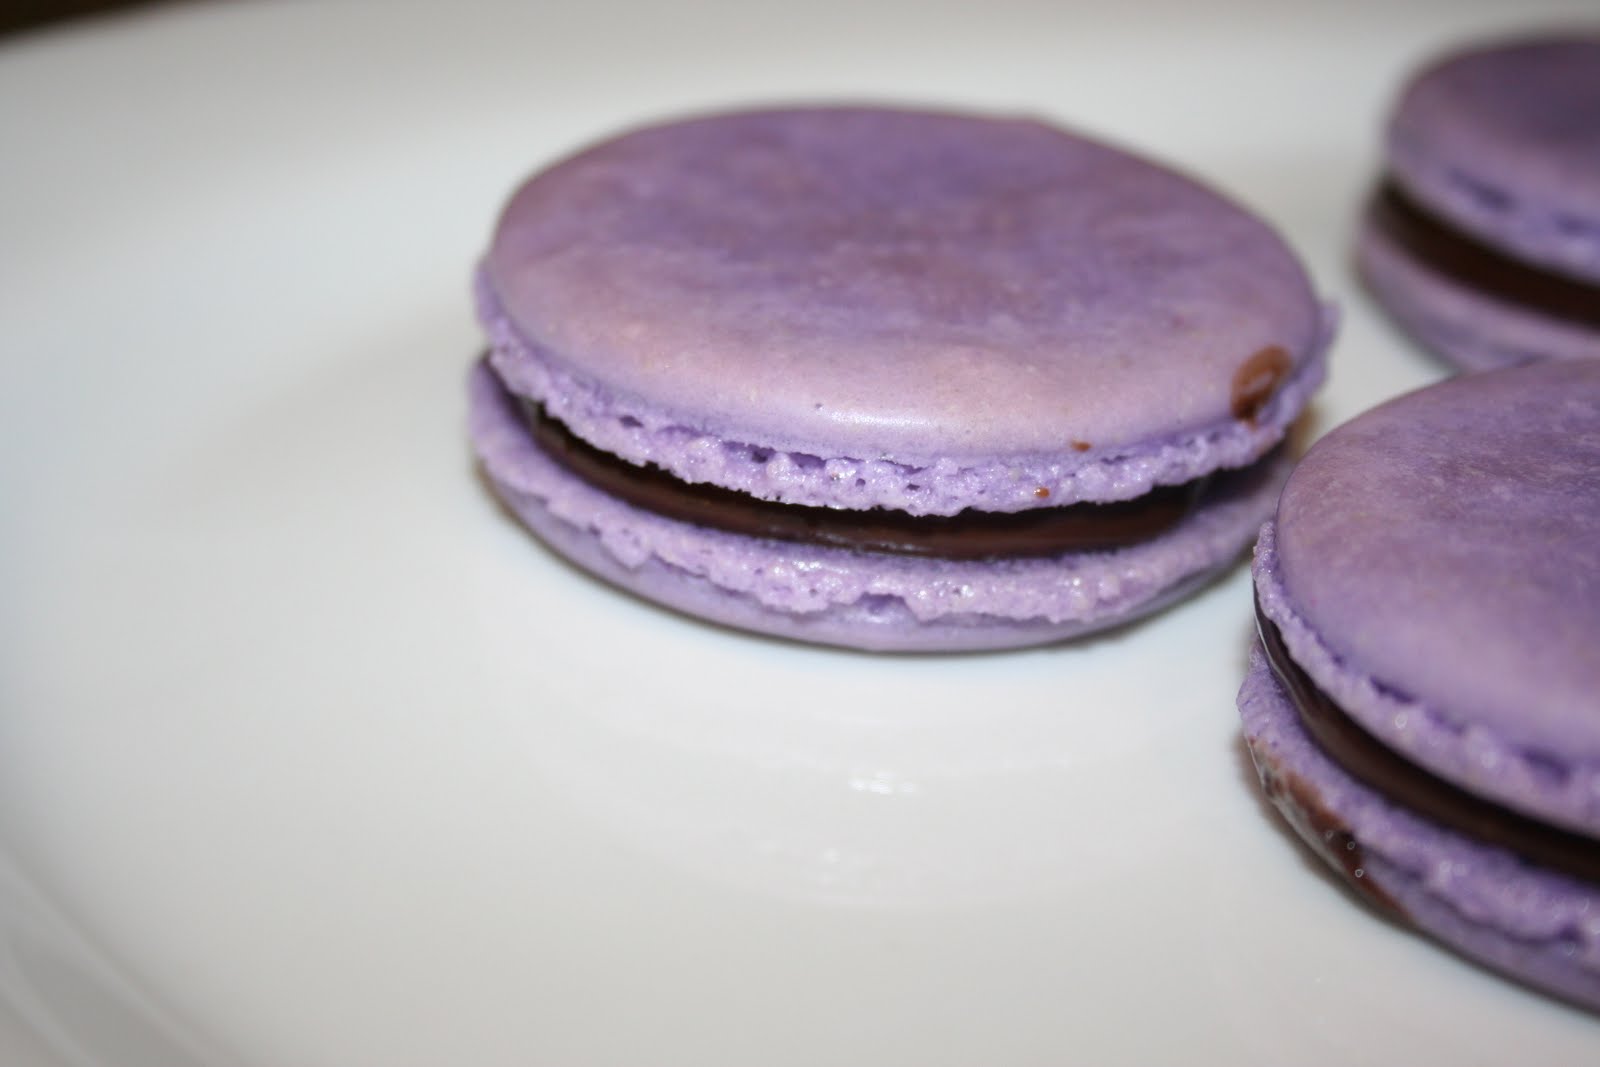
Black Pepper and Strawberry Macs

The MacTweets theme for this month was a spice and a fruit. Weird, but so many delicious combinations! At first I though of the obvious, like apple/cinnamon (yummy!), pumpkin pie (yummier!), and even thought of a lime/cilantro one but besides cilantro not being a spice I really just didn't want to go there! I decided on Black Pepper and Strawberry, which were super delicious! My favorite gelato flavor is an olive oil and black pepper. It is incredibly creamy with just a little bit of a fruity black pepper bite and I DREAM about it it's so delicious! I was hoping for the same effect with the macs. They were good, but next time I will change some things around. Also I decided to give the Italian Meringue version another try. It was better than the first few tries, but I can't quite seem to keep them from being hollow in the middles. Delicious nonetheless, of course! To punch up the strawberry flavor, I ground dehydrated strawberries in a coffee grinder along with the black pepper and filled them with a strawberry jam because I just wasn't sure how a buttercream would work with it. Next time I'll definitely try a mousseline type filling, though.


Here's the recipe that I used with the instructions on Not So Humble Pie's site:

150g confectioners sugar
150g almond meal
185g granulated sugar for syrup (plus one tablespoon for the meringue)
120g egg whites (divided)
50g water
1 tsp black pepper, finely ground
2 TB ground dehydrated strawberries


If you give it a try, let me know what you think!

Sunday, February 13, 2011

Mactweets Challenge!

I've been lurking the Mactweets page for a while now but finally got the nerve (and the time!) to participate! Hopefully this will be the first of many posts. This month's challenge Mactweets Mac Attack is, what else, but Valentine's Day themed! This worked out well because a sweet friend of mine, who is the best party thrower in the history of party throwers, co-hosted a Valentine's Day themed bridal shower and asked me to make pink and red macarons for the event. I decided on strawberry buttercream filled pink macarons and chocolate ganache with raspberry center AND raspberry jam with rose buttercream filled red macarons. Way too much cuteness in one place!


I recently started using a new recipe for macarons and it has worked out much better for me than the previous one. No more hollow shells! I tweaked this one from Sucre' in New Orleans (which will be in another post, one of many many many that I am behind on). The main problem that I was having with macarons was in the baking. If I baked them on a Silpat they came out hollow. If I baked them on parchment they were misshapen (which I've now found out that you can spray the pan with cooking spray then place the parchment on top of it to hold it down OR space the macarons closer together to weigh the paper down) ANYWAY, I found these babies and LOVE them! They're the perfect balance between Silpats and parchment. You can also cut them to size for your baking sheets. I use these on half sheet baking pans that I double up for insulation.

Ok, so here is the recipe:

100g caster sugar
100g egg whites (I age mine for 5 days in the fridge, covered with a paper towel)
125g powdered sugar
125g ground almonds
25g caster sugar (If it's humid outside I add 5g powdered egg whites to this)

Preparation:
Put caster sugar, almonds and powdered sugar in food processor and process until very fine. Sieve mixture through fine strainer to get any lumps out. Now whisk the egg white together with the second part of sugar at middle speed. Gradually whisk the egg white mixture to become very stiff (add color now if applicable). Fold the sugar/almond mix into meringue. I used to fold it into the meringue in thirds but now I dump the meringue into the sugar/almond mixture and fold and it works just as well. Now pipe the batter onto your parchment in 1.5 inch rounds, give it a good rap on the counter to get air bubbles out, then let sit for a good hour or so until it is not tacky to the touch. Preheat oven to 320. When macarons are ready, bake for 5 minutes, then briefly open the oven door to let some of the steam out, then continue baking for another 8-10 minutes. Let cool on pan, then fill.


For these beauties, I spread seedless red raspberry jam on one side and piped rose flavored Italian meringue buttercream on the other side. Then I smashed them together and let them hang out to become BFFs for a few days. I think they're in love. 


Tuesday, February 08, 2011

King Cakes!

It's that time of year again! We're still not sure if we're going home to New Orleans for Mardi Gras or not this year but either way I have been busy busy making King Cakes! I still have not perfected a really good King Cake icing. Most that I've tried have a raw powdered sugar taste to them and I'm convinced that the real deal has a little butter in it so if anyone has a good recipe please let me know! I also love the crunch of biting into granulated sugar, it's what a King Cake should taste like!

**I'll upload pictures soon


Freezes Well            Preparation time- 5 ½ hours   Makes two 9 X 12 inch cakes

Cake
1 stick plus 1 tablespoon butter  
2/3 cup 99% fat free skim evaporated milk
½ cup sugar
2 teaspoons salt
2 packages dry yeast (Fleishmann's is best and make sure to check the date of expiration)
1\3 cup warm water
4 eggs
1 tablespoon grated lemon rind
2 tablespoons grated orange rind
5 cups flour
1 cup flour, set aside for kneading and rolling

In a saucepan, melt 1 stick butter, milk, 1/3 cup sugar, and salt. Cool to lukewarm.

In a large mixing bowl, combine 2 tablespoons sugar, yeast, and water. Let stand until foaming, about 5-10 minutes.  Beat eggs into yeast; then milk mixture and rinds. Stir in flour, ½ cup at a time, reserving 1 cup to flour kneading surface.
Knead dough until smooth, about 5-10 minutes. Place in large mixing bowl greased with 1 tablespoon butter; turning dough once to grease top; cover and let rise in a warm place until doubled, about 1 ½ to 2 hours.
Filling
½ cup dark brown sugar, packed
¾ cup granulated sugar
1 tablespoon cinnamon
1 stick butter, melted

Topping
1 egg, beaten
1 cup sugar, colored (1/3 cup each of yellow, purple and green)
2 plastic babies (3/4 inch) or 2 lucky beans (dried fava)
For filling, mix sugars and cinnamon. Set aside.
For topping, tint sugar by mixing food coloring until desired color is reached (for purple use equal amounts of blue and red food coloring). A food processor aids in mixing and keeps the sugar from being too moist.

When dough has doubled, punch down and divide in half. On a floured surface, roll half into a rectangle 30 X 15. Brush with half of melted butter and cut into 3 lengthwise strips. Sprinkle half of sugar mixture on strips, leaving a 1 inch lengthwise strip free for sealing. Fold each strip lengthwise toward the center, sealing the seam. You will now have 3-30 inch strips with sugar mixture enclosed in each. Braid the 3 strips and make a circle by joining the ends. Repeat with other half of dough.

Place each cake on a 10 X 15 baking sheet, cover with a damp cloth and let rise until doubled, about 1 hr.  (Alternatively, instead of cutting and braiding the dough you can sprinkle the mixture on top of your rolled dough, then roll it up like a giant cinnamon roll and form it into an oval shape but personally, I think it's prettier braided.)

Brush each with egg and sprinkle the top with colored sugars, alternating colors.

Preheat oven to 350 degrees. Bake 20 minutes.
Remove from pan immediately so sugar will not harden. While still warm, place 1 plastic baby in each from underneath.
*To freeze: Wrap cooled cake tightly in plastic. Before serving, remove plastic and thaw. 

Tuesday, December 07, 2010

Lemon Macarons

I had an order last week for lemon macarons. My mind immediately went to those nasty little bastards that I call my second try at macarons. Not cool. I made a promise to the lemon gods that I'd do better this time.

Since I've all but sworn off the italian meringue method, I followed my (sort of) trusty macaron recipe that is adapted from Tartlette's basic macaron recipe. I decided not to add lemon zest to the batter this time, but might try it again next time, but will probably add it to the food processor along with the almonds and powdered sugar.

This order coincided beautifully with a wedding cake tasting that I had for Friday morning. They didn't give me a whole lot of direction when it came to cake/filling flavors so I just made a few new ones and a few of my favorites/best sellers. I made a dark chocolate cake with salted caramel buttercream, chocolate cake with whipped chocolate ganache, white cake with almond buttercream, white cake with raspberry mousse and white chocolate buttercream and a white cake with lemon curd and lemon mascarpone filling. 

I borrowed the recipe for both the curd and the mascarpone filling from Ms. Humble. Actually, for the cake I just borrowed the whole darn recipe, but since it was a cake for a tasting I had a ton left over. (Oh, darn!) I colored the macaron shells with a little lemon yellow coloring and filled with with both the lemon curd and the lemon mascarpone filling so that it wouldn't be too sweet nor too tart. Oh. Man. They were awesome! This will definitely be one that is added to the "menu". It also begs to be replicated with other fruits... maybe Louisiana strawberries with fresh sweetened whipped cream? Like a strawberry shortcake macaron? (I need to find a way to get said strawberries back to Austin, of course, but Mardi Gras might work out beautifully this year...)
 In all their lemony glory!

Tuesday, November 30, 2010

November Daring Bakers - Pecan Crostata

My original plan for the challenge this month was some sort of a caramel and chocolate ganache crostata. Sounds good, huh? Some day it will be but instead I decided to make a crostata for the husband's birthday. Since his birthday falls around Thanksgiving, it usually got lumped in with the family Thanksgiving celebration and his birthday "cake" was always a pecan pie, his favorite. With a candle, of course. I, on the other hand, do NOT like pecan pies. I try to like them, but the goopy sweet snot in the middle always ruins it for me. I usually end up eating the pecan topping and sadly throwing the rest away.

I decided that it was perfect for this month's Daring Bakers challenge. Since the tart pan is so shallow, it would have a better goop to pecan ratio. Awwwww yeah. But please don't tell my husband that I sacrificed his beloved pecan pie with something that would suit my tastes better. On his birthday. Whoops.


The 2010 November Daring Bakers’ challenge was hosted by Simona of briciole. She chose to challenge Daring Bakers’ to make pasta frolla for a crostata. She used her own experience as a source, as well as information from Pellegrino Artusi’s Science in the Kitchen and the Art of Eating Well.

I used the crostata recipe provided by Simona and it came out perfectly! Since I am a bit of the lazy side, I made the dough in my food processor. Here's how it goes:

  • 1/2 c. minus 1 tablespoon [105 ml, 100 g, 3 ½ oz] superfine sugar (see Note 1) or a scant 3/4 cup [180ml, 90g, 3 oz] of powdered sugar
  • 1 and 3/4 cup [420 ml, 235 g, 8 1/4 oz.] unbleached all-purpose flour
  • a pinch of salt
  • 1 stick [8 tablespoons / 4 oz. / 115 g] cold unsalted butter, cut into small pieces
  • grated zest of half a lemon (you could also use vanilla sugar as an option, see Note 2)
  • 1 large egg and 1 large egg yolk, lightly beaten in a small bowl.

  • Put sugar, flour, salt, and lemon zest in the food processor and pulse a few times to mix.
  • Add butter and pulse a few times, until the mixture has the consistency of coarse meal.
  • Empty food processor's bowl onto your work surface
  • Make a well in the center of the mounded flour and butter mixture and pour the beaten eggs into it
  • Use a fork to incorporate the liquid into the solid ingredients, and then use your fingertips.
  • Knead lightly just until the dough comes together into a ball.
  • Shape the dough into a flat disk and wrap in plastic wrap. Place the dough in the refrigerator and chill for at least two hours. You can refrigerate the dough overnight.


    *Superfine sugar is also referred to as baker's sugar, caster sugar or ultrafine. I found it at my local supermarket but it cost $5 for a small 1 lb bag. Instead, you can just put regular granulated sugar in a food processor and let it run until it's very fine.

    **The vanilla sugar idea sounded delicious but I didn't have any vanilla beans on hand, nor have I ever stored the beans in sugar so I added about a 1/2 tsp of vanilla extract to the sugar before  running it through the processor. Turned out really well and smelled divine!


    I blind baked the crostata at 350 degrees for 20 minutes before I filled it.


    Now, for the filling I used a recipe from Bon Vivant, but adapted it to my crostata.

    ½ cup light corn syrup
    ½ cup packed brown sugar
    3 tablespoons/ 45 grams unsalted butter, melted and cooled
    3 large eggs
    2 teaspoons espresso powder
    1 teaspoon vanilla extract
    ½ teaspoon ground cinnamon
    ¼ teaspoon salt
    7 ounces/ 200 grams pecan halves or pieces
    (I also used a handful of bittersweet chocolate chips but would not add them next time)

    Preheat the oven to 425F/ 220C.
    In a large bowl, whisk the corn syrup and brown sugar until smooth, then add the melted butter, whisking as you do so. Add the eggs, one at a time, beating each egg into the mixture before adding the next.
    Whisk everything until you get a smooth foamy mixture, then add the espresso powder, vanilla, cinnamon and salt and beat everything in. Rap the bowl against the counter a few times to remove any bubbles from the batter, then stir in the pecans and chocolate. Pour the filling into the crust.
    Place the baking pan on a baking sheet lined with parchment or a silicon mat. Bake the pie for 15 minutes. In the meantime, get your crust shield ready, or prepare one by cutting a 9-inch circle out of an 11-inch square of aluminium foil. When the 15 minutes are over, lower the heat to 325F/ 170C, place the foil shield over the crust and bake for another 15 to 20 minutes, or until the pie has puffed, is brown and doesn’t jiggle when tapped.
    Remove the foil shield, leave to cool to temperature before cutting and serving.


    Yum. Minimal goop.

    Wednesday, November 17, 2010

    Fundraising

    Well, today was the big bake sale! I made 4 dozen cupcakes and about 30 bags of macarons (3 in each bag). The cupcakes were dark chocolate (using my favorite, Hershey's Black Magic) with salted caramel buttercream, and also vanilla cupcakes with chocolate buttercream. The flavors of macarons were similar, pecan pie and dark chocolate ganache filled.


    The sale went really really well, I'm happy to report! By 3pm I was sold out of all goodies and we made ... $195 for Team Hudson!!! As exhausted as I am, it's a really amazing feeling. Since it went so well, I'm thinking that I'll hold another one in December! If so, I'm thinking of dark chocolate whoopie pies with a peppermint cream, more macarons, maybe egg nog? The pecan pie macs are such a huge hit, it would be a shame to not involve them as well... and one more... maybe a mexican hot chocolate macaron? I'll have to work on it and see what I can come up with!

    Monday, November 15, 2010

    Pecan Pie Macarons and Fundraising

    For a while there, I could have sworn that I lost my macaron mojo. Really, all of a sudden they would not work for me! There's a good chance that I've gotten that mojo back! Yahoo!

    In February, I will be walking with Team Hudson in the Christopher's Heart Energy for Life walkathon, benefiting the United Mitochondrial Disease Foundation. I figured that since I love to bake, I may as well sell some goodies to help raise money. Instead of chasing my crazed children around a random parking lot, I am going to be holding a "mobile" bake sale. I'll be traveling to different offices around the Austin area to sell the goods. If it works out well, I'll do it again in December, and then in January!

    This month I am selling pecan pie macarons, pumpkin rice krispie treats with dark chocolate and dark chocolate cupcakes with salted caramel buttercream. Sounds pretty delicious, huh?

    Pecan Pie macarons are definitely my favorites to make. I typically use macaron recipes from Tartelette's site, which I have had moderate success with. (Obviously not the recipe but the novice macaron maker in me) I have, however, followed a tip from the wise Ms. Humble Pie and add about 1/2 tsp of dried egg whites with the granulated sugar that goes into the meringue. It produces a beautiful, thick (and stable) meringue for me to fold the almond/sugar mixture into. It produces a batter that is much like the italian meringue version, but not as sweet since there is no added sugar syrup.

    Here is the recipe for pecan pie macarons, adapted from Tartelette's recipe:

    For the shells:
    90 grams aged egg whites*
    40 gr granulated sugar mixed with about 1/2 tsp dried egg whites**
    200 gr powdered sugar
    55 gr almonds
    55 gr pecans

    * I usually age my egg whites in the refrigerator for about 5-6 days in a bowl lightly covered with a paper towel.
    **NOT meringue powder, as it has added sugar and other... stuff. I usually find dried egg whites at my local grocery store right next to the meringue powder, though, in the baking aisle.


    In a stand mixer fitted with the whisk attachment, whip the egg whites to a foam, gradually add the sugar until you obtain a glossy meringue. Do not overbeat your meringue or it will be too dry. Combine the almonds,pecans and half of the powdered sugar in a food processor and give them a good pulse until the nuts are finely ground. Sift this mixture with the other half of the powdered sugar. You may have a few pieces of nut that are too large to fit through the strainer. Use your best judgement on whether they need another round in the processor or if you can just chunk them. If it's just a gram or two I just chunk them) Add about 1/3 to the meringue, give it a quick fold to break some of the air and then add another 1/3 and fold carefully, then the last 1/3 until you obtain a batter that flows like magma or a thick ribbon. Give quick strokes at first to break the mass and slow down.The whole process should not take more than 50 strokes. Test a small amount on a plate: if the tops flattens on its own you are good to go. If there is a small beak, give the batter a couple of turns.
    Fill a pastry bag fitted with a plain tip (I use the Wilton 2A) with the batter and pipe small rounds (1.5 inches in diameter) onto parchment paper or Silpat) lined baking sheets. Preheat the oven to 300F. Let the macarons sit out for 30 minutes to an hour to harden their shells a bit and bake for 15-20 minutes, depending on their size. Let cool. If you have trouble removing the shells, pour a couple of drops of water under the parchment paper while the sheet is still a bit warm and the macarons will lift up more easily do to the moisture. Don't let them sit there in it too long or they will become soggy. Once baked and if you are not using them right away, store them in an airtight container out of the fridge for a couple of days or in the freezer.

    Typically 1 batch of batter, for me, makes about 56 macaron halves. I use half sheet pans, doubled up to provide a little insulation, with Silpats.


    For the filling for my pecan pie macarons, I use a recipe The Cookbook Chronicles.

    Here you go:
    Salted creme fraiche caramel
    1 ¼ cup sugar
    1/3 cup water
    ½ cup heavy cream
    1 stick unsalted butter
    2/3 cup crème fraiche
    1 vanilla bean, scraped (or 1 tsp vanilla bean paste)

    1 tsp kosher salt (or ½ tsp table salt, to taste)

    First, have all your ingredients pre-measured and close at hand.


    In a skillet, combine the water and sugar over high heat. Cook until the sugar has liquefied, and turned a dark amber color. You can give the sugar one initial stir to mix the water and sugar but do not touch it afterwards or else sugar crystals will form. (This will take about 10-12 minutes.) Immediately, stir in the butter. Turn off the heat. Stir in the heavy cream–it will bubble up, and then subside.


    Finally, stir in the creme fraiche, scraped vanilla bean, and kosher salt. Let it cool to room temperature. Cover and store in the refrigerator for up to two weeks. (You can warm it up in the microwave before using if you would like it runnier.)

    Wait until the ganache is thoroughly chilled, fill with about 1- 1.5 tsp caramel and top with other half. Macarons need about 24-48 hours to "mature" before they're ready to eat. The macaron shells need to absorb a bit of the moisture from the filling to get that tender, beautiful macaron bite to them.


    I hope you enjoy!!!

    Wednesday, October 27, 2010

    Doughnuts! - Daring Bakers October 2010

    OKAY! My first Daring Bakers challenge is now complete! Done! Whew! I'd been wanting to join The Daring Bakers for a while now but hadn't had "the onions" until my raging jealousy got the best of me when I found out that their last challenge was sugar cookies. Oh, the fun I could have had! Bah!

    The October 2010 Daring Bakers challenge was hosted by Lori of Butter Me Up. Lori chose to challenge DBers to make doughnuts. She used several sources for her recipes including Alton Brown, Nancy Silverton, Kate Neumann and Epicurious.

    The doughnut challenge totally freaked me out because I'm not a fan of frying. Don't get me wrong, I'm a southern girl so I like fried just about anything, but the actual act of frying is not my thing. Spattering oil, hot messes, bad timing and don't even get me started with the clean up! I put it off until the last possible day. Seriously, I made the dough yesterday and fried them this morning. All month I tried to come up with an original spin on doughnuts. I decided almost immediately to use the recipe given for bombolonis, which are italian doughnut holes. My craving for my all time favorite pastry, the cannoli, kept coming back to me. Why not, right? After all, I may as well put an italian spin on it.

    The dough itself was incredibly easy to make, especially in a stand mixer with a dough hook. (which had not been used in the 5 years that I've had it. ever. really.) It was seriously tricky to roll out. The recipe states that you should roll it out on a lightly floured surface but mine definitely needed more than a little flour!


    Of course, just in case they sucked I needed a back up doughnut and for this I used the original recipe, which called for raspberry jam filled bombolonis. I rolled these in superfine sugar and filled them with a decent quality raspberry jam.


    As for my crazy cannoli doughnut, I made a regular cannoli filling with whole milk ricotta that had been draining for 24 hours, mixed with powdered sugar, cinnamon and mini chocolate chips. I also folded in a little freshly whipped cream to lighten it a bit. After frying the doughnuts, I rolled them in a mixture of powdered sugar, cinnamon, allspice and ground pistachios, then filled them with the ricotta mixture after they'd cooled a bit. They were pretty tasty but definitely left me wanting the crunchy cannoli shell.


    Neither of the kids had a problem with the doughnuts, in fact Ellie thought they needed more filling. You can see her chipmunk cheeks are FULL of doughnut!


    All in all, I think that I'll leave the doughnuts to my all time favorite place, Lone Star Bakery (Round Rock doughnuts, they're seriously hard to beat!) but I can't wait for my next challenge!

    Saturday, September 18, 2010

    Short Ribs

    I love short ribs but have yet to make them myself. I'm all over any recipe that starts with 3 bottles of wine!

    Daniel Restaurant New York - Short Ribs Braised in Red Wine

    3 bottles dry red wine
    2 tablespoons vegetable oil
    8 short ribs, trimmed of excess fat
    Salt and crushed black peppercorns
    Flour, for dredging
    8 large shallots, peeled, trimmed, split, rinsed and dried
    2 medium-sized carrots, peeled, trimmed and cut into 1-inch lengths
    2 ribs of celery, peeled, trimmed and cut into 1-inch lengths
    1 medium-sized leek (white and light-green parts), coarsely
    chopped, washed and dried
    10 cloves of garlic, peeled
    6 sprigs flat-leaf parsley
    2 bay leaves and 2 thyme sprigs
    2 tablespoons tomato paste
    3 quarts unsalted beef broth
    Freshly ground white pepper

    1. Pour the wine into a large saucepan set over medium heat. When
    the wine is hot, carefully set it aflame. Let the flames die out,
    then increase the heat so that the wine boils; allow it to boil
    until it cooks down by half. Remove from the heat.

    2. Center a rack in the oven and preheat to 350°F.

    3. Warm the oil in a large, heavy, ovenproof pot over medium-high
    heat. Season the ribs all over with salt and the crushed pepper.
    Dust half of the ribs with about 1 tablespoon flour. Then, when the
    oil is hot, slip the ribs into the pot and sear 4 to 5 minutes on
    each side, until well-browned. Transfer the ribs to a plate. Repeat
    with remaining ribs. Remove all but 1 tablespoon of the fat from
    the pot, lower the heat under the pot to medium and toss in the
    vegetables and herbs. Brown the vegetables lightly, 5 to 7 minutes,
    then stir in the tomato paste and cook for 1 minute.

    4. Add the wine, ribs and broth to the pot. Bring to a boil, cover
    tightly and place in the oven to braise for 2 1/2 hours or until
    the ribs are very tender. Every 30 minutes, skim and discard fat
    from the surface. (It's best to make the recipe to this point, cool
    and chill the ribs and broth in the pan overnight; scrape off the
    fat the next day. Rewarm before continuing.)

    5. Carefully transfer the meat to a platter; keep warm. Boil the
    pan liquid until it has reduced to 1 quart. Season with salt and
    white pepper and pass through a fine strainer; discard the solids.
    Spoon the sauce over the meat and serve.

    Tip: the ribs and sauce can be combined and kept covered in the
    refrigerator for 2 to 3 days. Reheat gently, basting frequently, on
    top of the stove or in a 350°F oven.

    Wednesday, September 08, 2010

    Patricia's Meatball Soup

    Seriously the best soup in the universe. It will cure whatever ails you!

    1 lb lean ground beef (I use 96/4)
    salt and pepper
    1 Tbsp olive oil
    1 16 oz bag mixed frozen vegetables
    4 cans Campbell's beef broth
    1 28 oz can petite diced tomatoes
    either 1 can of drained corn or 1 cup of frozen corn kernels
    1 medium potato, washed and diced with skin on
    1/2 large or 1 small onion, diced
    3 carrots, sliced OR about 1 1/2 cups sliced baby carrots
    2 cloves garlic, minced (I use a microplane b/c I'm lazier than the average bear)

    Mix ground beef with about 1 tsp each salt and freshly ground pepper, roll into mini meatballs about the size of a bouncy ball. (Not a parent with children addicted to bouncy balls? About 1 inch in diameter)

    In a mixing bowl, pour 2 of the cans of beef broth in and set aside.

    Heat the oil in a dutch oven type dish over medium high heat. Add meatballs and get them good and brown on all sides. When all browned and delicious, throw them into the bowl of broth and let them hang out until ready to use.

    To the remaining oil, add onion and sweat until translucent. Add garlic and let cook for a few more minutes. Add the mixed veggies, corn, carrots, tomatoes, tomato sauce and remaining 2 cans of beef broth and simmer for 15 minutes or so.

    Add diced potatoes and let simmer for another 30 minutes.

    Add meatballs and broth and let simmer for another hour or more. Season with salt and pepper to taste. I usually add another tsp of salt and about 1/2 tsp of pepper.

    Tuesday, August 17, 2010

    Macaron Madness!

    One little ad at the side of a webpage was all it took to start the frenzy that has taken over my house for the past two weeks:

    Seriously, who could resist these colorful little morsels? I had no idea what they were but I knew I had to have them. Finally after a couple of months of searching I figured it out and have been reading about them ever since! I could not find them anywhere in Austin, except recently in the frozen section of Spec's, so I decided to bite the bullet and try them out. How hard can they really be, right? They're COOKIES.

    Despite those cute little ruffled edges (called feet, I have learned) and colorful exteriors, there is quite a bit of work that goes into these suckers and it's not easy. There are two methods of making them- french meringue and italian meringue. My first batch was from a recipe found at Tartelette. Helen of Tartelette, by the way, makes the most amazing looking desserts. She's french, so naturally amazing food and pastries are embedded in her DNA!

    Sorry, back to macarons.

    Anyway, my first batch was using the french meringue and while they tasted fine, they did not have feet. Booooo... That, and they stuck to the parchment. After reading a bit more, found that beginners find the italian meringue easier since it's more stable. I tried that and VOILA! Feet! Seriously, on my SECOND try I had feet! The kids and I all danced around the oven screaming "WE HAVE FEET!" with Ellie yelling "YAYYYYYYY!". Anyway, the cookies had feet but were completely hollow on the inside. Eh, whatever, they were pretty and I was super done with baking so I made the filling because I had been dying to make another cotton candy buttercream anyway. They still tasted good but were way way way too sweet. You think? They were pretty so I excused the hollowness and ate more than my share, gave a bunch to neighbors who probably think I'm insane and to friends.


    Pretty, aren't they?

    Well, after reading a long, albeit very entertaining tutorial about what I did wrong, I set about making another batch. This time I was dying to make the lemon meringue fillings that I saw on Tartelette. I made another batch of macarons using the same italian meringue. The exact same way except I let these rest on the counter for an hour to let the shells harden. The bastards let me down. Again. They were still hollow, still super sweet AND to add insult to injury most of them stuck to the freaking parchment paper! Bastards. I basically said screw it and filled them anyway just to taste and take the stupid pictures. I filled them with lemon curd and marshmallow cream. Way too sweet and just a big disappointing meh all around.


    I'm the lemon meringue macaron and I'm a bastard


    Oh, and after this batch my stupid candy thermometer gave me the big middle finger and shouted "I quit this bitch!". The rudeness was not necessary so I gave up on the italian meringue method. How's that for quitting a bitch?

    So, back to the french method I went. I read another tutorial, which actually helped a lot and made a few more batches. Also, I bought a few silpats which I am still not convinced are necessary but I feel all professional like so I use them anyway. Well, I use them on 2 pans at a time because that's all my budget would allow at the time.

    I aged my egg whites, which totally grosses me out to let egg whites sit around for a day or two but for the sake of these cookies I did it anyway. Well, after a few changes to my original recipe and method I finally had feet! They still stuck to the silpat/parchment but still a huge improvement over the first batch of those divas.
    I filled the suckers with the most delicious dark chocolate ganache that you can imagine and we gobbled them up for breakfast the next morning. Yumminess, sticky feet and all. The french method is way tastier and not as sweet since you don't have the added sugar syrup. Much preferred.


    Eat me.


    Finally this week I reached near macaron perfection! They were tasty, beautiful and everything I ever dreamed of and more!


    It's like the heavens opened up and shined down on us, just for Katie


    I filled these cute little bitches with strawberry-white chocolate ganache. I much prefer the dark chocolate deliciousness of last week but they'll still eat.

    Wednesday, June 23, 2010

    Enchiladas Suizas

    I love these enchiladas! This recipe is adapted from The Homesick Texan's recipe that I found on another blog. It's easy and very delicious! To make it just a tad lighter, I tried using both light and fat free sour cream and both time they were just as tasty.


    Enchiladas Suizas

    You will need:
    4 boneless chicken breasts, cooked and shredded (I used the meat from a whole rotisserie chicken instead)
    3 large cloves of garlic, minced
    2 Serranos, finely diced (seeds-in if you like the heat; otherwise cut seeds and membrane out)
    1 Jalapeno, seeded, minced
    2 Tbsp butter
    2 Tbsp all-purpose flour
    2 cups chicken broth
    2 cups sour cream
    16 oz jar of Salsa Verde (I used HEB Green Chile Verde salsa and it was really good)
    1 & 1/2 tsp cumin
    1/2 tsp salt
    1/4 tsp white pepper
    1/2 tsp garlic powder
    1/4 cup cilantro, chopped
    12 corn tortillas, small fajita size
    2cups shredded Monterrey Jack
    1/2 medium onion, diced


    Preheat the oven to 350. Melt butter over medium-high heat. Saute Serranos and Jalapenos until soft and then add the garlic, cooking for 1 minute. Stir in the flour and let cook 1-2 minutes. Whisk in the chicken broth until smooth and let cook until bubbly. Stir in the sour cream, salsa, cumin, cayenne, salt, pepper, garlic powder and cilantro until the sauce is smooth. Remove from heat.

    Spray/grease a 9×13 baking dish. Add 1 cup of sauce to the bottom of the pan. Add chicken, cheese, and chopped onion to the center of each tortilla and roll, placing seam-side down in the dish. Pour the sauce over the enchiladas, top with leftover cheese, and bake at 350 for 25 minutes or until top is brown and bubbling.

    To freeze: Cook the sauce and cool completely (I do it quickly using an ice water bath). Assemble the enchiladas in portion-friendly dishes and wrap well with plastic wrap or foil. To cook thawed, bake at 350 for 30-35 minutes (or to an internal temperature of 165). To cook straight from the freezer, increase the baking time to 45-55 minutes.

    Yields: 12-15 enchiladas

    Sunday, May 02, 2010

    Stuffed Artichokes

    My Grandma Rosie was the QUEEN of stuffed artichokes, one of my many favorite dishes that she would make. We normally ate them on Good Friday, but I swear that I could eat them every day for the rest of my life and I'd be a happy girl! I have only made them a handful of times but could not resist when I saw fresh artichokes on sale at my local grocery store this week. Hope you enjoy!


    Stuffed Artichokes
    4 artichokes
    4 hard boiled eggs
    2 cups Italian breadcrumbs (we usually use Progresso brand)
    1/4 cup finely minced fresh parsley
    2/3 cup finely grated parmesan or Romano cheese
    5 cloves minced garlic
    1 ½ Tbs fresh lemon juice
    1 tsp salt
    ½ tsp ground black pepper
    ¾ cup olive oil (use maybe about ¼ cup in stuffing mixture, set the rest aside)
    4 slices fresh lemon
    In food processor, mix together eggs, breadcrumbs, minced parsley, cheese, minced garlic, salt, pepper, lemon juice and about ¼ cup olive oil. Pulse until mixed to “granular” form, like wet sand. (You don’t taste the eggs, it’s just to help bind the mixture)
    Lay each artichoke on its side and cut off the pointy tops with a sharp knife, usually about ½ inch to 1 inch or so, sometimes more. Cut off the artichoke stems. After cutting off the stems, your artichokes should be able to sit on their flat bottoms. Tear off the tough outer leaves at the base of each choke. With a pair of scissors, cut off the pointy tops of the remaining outer leaves.

    Beginning at the top of the artichoke spread the leaves as much as possible and pack in a generous amount of stuffing. Continue around the artichoke until all leaves are completely filled down to the bottom. ( Note: It is always best to stuff the artichokes inside the bowl of stuffing so that the excess breading falls back into the bowl.) Tap each artichoke gently to let any loose stuffing fall off. Drizzle each artichoke with remaining olive oil so that it seeps down into the stuffing and top with lemon slice.
    Stand artichokes in a roasting pan or high sided sauté pan just large enough to hold them in a single layer. (If you don’t have this size, you can also take aluminum foil and squish it into a tube, then make small circles around the artichoke base to help them stand on their own)
    Carefully pour lightly salted water to a depth of 1 inch around the artichokes, being careful not to get water on them or into the stuffing. Set pan over high heat and when the water comes to a boil cover the pan and turn the heat to very low. Cook for 45 to 50 minutes, or until the outer leaves pull off easily and are tender on the inside.
    When cooked, remove the artichokes from the pan with tongs, lifting them straight up so as not to disturb the stuffing. Hold over the pan for a few seconds to let water drain off, then set on a large platter. Let cool for about 15 minutes then serve.
    Make sure not to eat the choke, which is the hairy stuff in the middle. Take the choke off and you’ll see the actual artichoke heart. This is delicious with a little lemon juice and olive oil drizzled on it.

    Monday, February 01, 2010

    More Poop Stories...

    I don't know why all of my posts seem to revolve around Will and his poop, but I guess it's kind of the only amusing things that happen around here nowadays! We're all done with potty training now and I am so so so happy! Will actually really gets a kick out of seeing his poop in the potty, he thinks that it's pretty cool. He's such a little man, he is all about his body functions!

    Here are a couple of recent funnies:

    Last week he had a tummy bug and had diarrhea for about a week. He calls it "fast poops" because it comes out really fast. Also, it's easier to pronounce than diarrhea, I guess. Poor guy just could not stop crapping, it came out like a faucet! So at one point, he was on the pot and this big gush of poop and farts came out. Me, in all my classiness, said "Oh gross, that was a huge shart!" (Not realizing that at some point I'd have to explain "shart" to him) He looked at me with the widest eyes and said "There's a shark in the potty? The shark is going to bite my butt? Shark is going to eat my fast poops?" It took the rest of the night to convince him there was no shark in the potty. Sigh.

    So, now he's over the bug or whatever it was, and is back to having "normal poops", which are much easier for him to enjoy.


    Last night after bathtime he decided that it was time to poop. He sits down, grunts a little bit and this GIGANTIC turd comes out. He looks at it, laughs and says in an incredulous voice "WOW, that's a big poop, Mama! LOOK!" Then Will gets a really sad face on and says pitifully "He is all alone! He has no friends! He goes 'I have no friends! I have no friends!' It's okay, I make you friends." GRUNT.

    The funniest part was him acting out the turd saying "I have no friends! I have no friends!" and then reassuring the turd. Such a sweet boy, never wants to hurt anyone's feelings.

    Thursday, August 27, 2009

    Adventures in Potty Training...

    We're right in the middle of potty training Will. We've got the peepee down but I can't get him to poop in the potty to save my life. Right now I'm feeding him prunes like they're going out of style, hoping that he'll accidentally push it out while he's peeing. So far it hasn't worked so I'm taking that to mean that he needs to eat more prunes.

    Last week I heard Will in the bathroom and he told me that he pooped in his underwear. Since I was feeding Ellie I told him to clean it up by himself. (Also hoping that it would deter him from pooping in his undies in the future) Then I hear him say "OH NO! Poop fall on floor, need help Mommy!" I go into the bathroom and see this baseball sized lump of poo on the floor. That's gross.

    I leave for 5 SECONDS to put Ellie down and I hear "MOMMY! JENNY EAT POOP! JENNY EAT POOP! GROSS JENNY! BAAAAAD DOG!" I thought to myself " Surely she's not actually eating his poop because that would be disgusting. She's probably just sniffing at it and he's confused..."

    No, she scarfed that shit up so fast that she was already on her after dinner drink by the time I got there.

    So gross!

    Sunday, June 29, 2008

    Ketchup Post


    Sorry for the lack of posts, it's been crazy busy! I ended up spending about 4 weeks as a non contributing member of society. Don't think that I just sat around eating bon bons and watching Oprah (or Maury in my case. I'm totally trashy like that) I got a lot done! I spent most of my time gardening, I redecorated Will's bathroom and the guestroom, cleaned the hell out of our house (which has already gone to hell again) and organized a ton of stuff. Oh, and I shopped. A lot.

    I also read a book! A whole book without pictures and it had nothing to do with Elmo! Pure bliss! It's called Escape, by Carolyn Jessop and it was awesome. I had read "Under the Kingdom of Heaven" by Jon Krakauer a few years ago (back when I had time to read) and liked it, although it was tough to get through. I called it "my airplane book" because that was about the only time that I could make myself sit down and read it. Kingdom is all about the Mormon religion, from beginning to present and focuses on the FLDS church. (Which is the Fundamentalist Church of Jesus Christ of Latter Day Saints) Escape is the story of Carolyn Jessop, who was born into the FLDS church and at 18, was married off as the fourth wife to a man who was in his 50s. In 14 years, she had 8 children with him, then escaped and won a long custody battle against him. Her testimony helped to bring charges against Warren Jeffs. (Who, if you read the book or anything about him, is freaking insane. Or evil, I don't know.)

    Anyway, it was an awesome book! I'm now (slowly) trying to read "Me Talk Pretty One Day" by David Sedaris. It's good, and I've heard really good things about it, but I just don't have any time to read, yet again!

    Which brings me to my current schedule. I accepted a job with a great company, but it's still close to downtown. The commute isn't nearly as bad as it was when I was working downtown, but it's not ideal. I'll put up with it, though. The job is pretty easy, the people that I work with and work for are fantastic and I'm still making about the same as what I was with BBcom. Not too shabby!

    It was really quick process. Within days of applying, they called me for interviews, then more interviews, then almost immediately offered me the position and I started two days later. It was so quick that I hadn't had time to finish one of my garden beds where the last of the purple sage bushes had been cleared. Oops! With all of the work that I did around the house, (and only being 5'1") I developed tendonitis in my right elbow. At least that's what my self diagnosis is. It's getting better, but I'm still blaming it for not having finished that garden bed.

    Mr. Will on the other hand is one lazy sonofa... just kidding. He's getting HUGE! It's so crazy how fast he's growing. I'll have to post some videos soon! In the meantime, here are a few pictures.


    This is his "funny face". We tell him "Will, show me your funny face" and this s what he does. A total coincidence, but this is the same face that I used to make when I was little.


    This is why I should never sit back and relax when he's quite. Although, I'll admit, that it could've been a lot worse.


    And finally, this is a cute picture that my Aunt sent me last week. No, we didn't put a wig on Will! And yes, I guess you've all seen my boobies now. ;-)

    Friday, May 23, 2008

    Baby Jail

    Tonight I was putting Will to bed, but he was kind of wired. When he gets like that, he tends to run around his crib until he falls down, then he laughs and does it all over again until he's tired. Weird, huh? Well tonight he was running around the crib, then back and forth, and then all of a sudden he ran towards the edge (the railing was down because I hadn't kissed him goodnight yet) and he pushed himself off the railing and BAM! Did a flip and landed on the floor. It happened so fast that all I had time to do was yell "OH MY GOD!" What does he do? Gets up, laughing, and tries to do it again.

    When I was little, I did the exact same thing. My parents couldn't keep my in my crib. In the middle of the night, they'd wake up to me staring at them. They even installed a net over my crib to keep me in, but like the little turd that I was I still found a way out.

    We're completely screwed.

    Friday, May 16, 2008

    Being a Woman of Leisure... Cont'd...

    Ok, sorry about that! Tornadoes freak me out and hearing Chris (the guy with tornado experience) say "Get off the computer and get your shoes on. The storm will be here in 4 minutes." kind of freaked me out. It ended up passing just north of us, so we only got a little of it. Even the little that we got was pretty scary, so I can only imagine how people in the middle of the storm fared.

    Anyway! Back to the awfulness that is WalMart. I hate that store but decided to brave it for some Pudding Pops and carpet cleaner. I ended up getting a couple of other things while I was there, but spent FOREVER on the carpet cleaners. Which one should I get? Spray? Powder? Foam? Finally decided on some Resolve powder stuff that came with a wide brush. Looked easy enough.

    I get to the check out aisle, unload my few purchases (I made sure to grab the Pudding Pops last so that they didn't melt). The surly checker guy (very Walmart, very unhappy) scanned everything, in the middle was the carpet cleaner. He scanned it four times, each time it said "Item not found". So instead of calling for help or trying to figure it out, he simple set the carpet cleaner on a shelf behind him and said "Must be a new item. You probably didn't even get it from the right aisle. Sorry." Huh? Not wanting to start a huge argument and possibly be shot, I just said "No, it was in the aisle with all the other carpet cleaners. So, are you telling me that I cannot buy this?" "No. You can't buy it." he replied with his perfected 'Don't give a shit' attitude. "Can you just ring up an open item for $4.97? Or just give it to me? This cleaner is half the reason that I came here." "No. I can't. Sorry."

    Beautiful. At this point there were 4 people lined up behind me so running to grab another cleaner felt like it wasn't really an option. Again, trying to avoid getting shot.

    I left the store happy that I finally had the Pudding Pops that I craved throughout my entire pregnancy but could never find, but dumbfounded as to what had just happened. I can understand a new item not being in their system, but I think that at any other store they wouldn't have just said "Sorry, can't have it." and offer absolutely no alternative solution. So annoying. I was reminded as to why I never step foot in that store.

    On a bright note, the pudding pops were delicious! I think that they would've tasted better had I been pregnant but they had the icy coating that I craved. So now I know where to get them next time I'm pregnant, but for now I think that I'll go back to my other favorite popsicles.

    Anyway, so we're going to Pampa this weekend to visit Chris' family. It should be a fun time, but I am definitely not looking forward to the 8 hour drive! Flying isn't really an option since we have so much crap to take with us (you know, the Pack & Play, highchair, Will... the usual stuff) but today I'll go to Target for more Elmo DVDs to help distract him for a few hours. Hopefully we won't have any tornado scares while we're there. Last May we were in with 5 month old Will and we stayed up all night watching the Weather Channel. There were a few tornadoes that ended up passing through about a mile or two south of town. Talk about scary!

    Ok, now I have carpet to clean, laundry to fold, suitcases to pack and toes to be pedicured! Have a great weekend!

    Wednesday, May 14, 2008

    Being a Woman of Leisure....

    Ok, so not really but I like the title. I'm sitting here at 9:30 on a Wednesday night watching the weather. Why, you ask, am I watching the weather instead of Top Chef? Especially when I opened a bottle of Merlot? (not just for amateurs anymore!) Because there might be a tornado here in approximately 8 minutes. AHHH!! THIS is why I don't live in the Panhandle! WHY is this happening here?? So I'm sitting here watching the weather while Chris cleans out the downstairs closet just in case...

    Anyway, so I stepped WAY out of my comfort zone the other day. I heard a rumor that there were Jello Pudding Pops at a Walmart close to me. Let's get one thing straight. I don't do Walmart. Walmart freaks me out. Unhappy people go to Walmart. They're all unhappy, dirty and rude. And Walmart is dirty. I decided that it was worth it.

    Wait, more to come. I have been instructed to get my shoes on and get ready to grab Will...